dmhsq/electron-vue-dmhsq
This commit does not belong to any branch on this repository, and may belong to a fork outside of the repository.
Branches Tags
Folders and files
| Name | Name | Last commit date | ||
|---|---|---|---|---|
Latest commitHistory23 Commits | ||||
electron | electron | |||
public | public | |||
src | src | |||
README.md | README.md | |||
babel.config.js | babel.config.js | |||
package-lock.json | package-lock.json | |||
package.json | package.json | |||
vue.config.js | vue.config.js | |||
Repository files navigation
基于Vue2.x
- electron-vue-dmhsq
- 目录说明
- 安装依赖
- 热开发页面
- 只打包vue 不打包electron
- 热开发页面
- 热开发electron
- 打包electron应用
- 安装依赖
- 1.解决fs.existsSync is not a function
- 2.解决electron发送请求时http://变file:// (也能解决代理)
- 3.实现登陆以及切换用户
- 方案一 主进程使用菜单切换
- 方案二 Vue开发的页面触发切换
目录说明
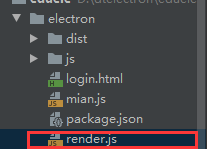
electron文件夹控制桌面端的运行打包
 其余均为 vue目录
 electron/main.js  桌面应用主程序
 electron/rebder.js  桌面应用渲染程序
博客地址
https://blog.csdn.net/qq_42027681/article/details/112077082
最终打包需要删除electron/main.js中的fs模块 如果您只是想打包vue项目成exe
npm run builds
执行完成后
在electron文件夹中
npm run build
github地址
electron中的 dist和src为测试 不用理会
安装依赖
npm install
热开发页面
npm run serve
只打包vue 不打包electron
npm run builds
热开发页面
npm run build
执行完成后
开启额外的控制台
cd electron
npm run serve
热开发electron
npm run builds
执行完成后
开启额外的控制台
cd electron
npm run serve
打包electron应用
最终打包需要删除electron/main.js中的fs模块
npm run builds
执行完成后(如果页面已经打包过无需此步)
在electron文件夹中
npm run build
其它 说明
1.解决fs.existsSync is not a function
vue引入electron的ipcRenderer等其它模块会出现这种情况 解决方案 自定义事件 使用渲染进程捕捉
在你的页面代码(比如vue文件)中加入
let cus = new CustomEvent("test_event",{detail:{你的数据}});
window.dispatchEvent(cus);
解释: cus定义了一个window事件 detail传递数据 test_event:自定义事件名 window.dispatchEvent(cus);触发自定义事件
在渲染进程
const { ipcRenderer } = require("electron");
window.addEventListener('test_event',(e)=>{
  console.log('开始了哦')
  console.log(e.detail)//这里就是你发送的数据
  ipcRenderer.send("test",e.detail);
})
渲染进程使用ipcRenderer向主进程发送数据 说明test为向主进程发送的事件名
以下为主进程接收代码
ipcMain.on("test", () => {
  ...做处理
});
2.解决electron发送请求时 http://变file:// (也能解决代理)
发送请求时触发一个事件 比如
export const find = params => {
  let cus = new CustomEvent("axioes");
  window.dispatchEvent(cus);
  return axios.get("/api/find", { params: params });
};
在渲染进程中
window.addEventListener('axioes',()=>{
  ipcRenderer.send('axioso')
})
在主进程中(需要引入session模块)
const {
  app,
  BrowserWindow,
  Notification,
  Menu,
  MenuItem,
  ipcMain,
  net,
  session
} = require("electron");
ipcMain.addListener("axioso", () => {
  resq();
});
function resq() {
  const filter = {
    urls: ["*://api/*", "file://api/*"]
  };
  session.defaultSession.webRequest.onBeforeRequest(
    filter,
    (details, callback) => {
      console.log(122131231);
      console.log(details);
      // details.url = "http://www.baidu.com"
      let srt = details.url;
      details.url = "http://localhost:8080" + srt.substr(10);
      callback({ redirectURL: details.url });
      console.log(details);
    }
  );
}
说明:
const filter = {
    urls: ["*://api/*", "file://api/*"]
  };
定义匹配api字符串的请求的拦截规则
说明:
 session.defaultSession.webRequest.onBeforeRequest(
    filter,
    (details, callback) => {
      console.log(122131231);
      console.log(details);
      // details.url = "http://www.baidu.com"
      let srt = details.url;
      details.url = "http://localhost:8080" + srt.substr(10);
      callback({ redirectURL: details.url });
      console.log(details);
    }
  );
在发送请求之前 改写请求地址 原本我的请求地址是 http://localhost:8086/edusys/admin/find 使用代理为 /api/find 我的vue项目端口为8080 所以需要将"/api/find"变为" http://localhost:8080/api/find" 所以我的nginx配置如下
   server {
            listen       8080;
            server_name  localhost;

            location / {
                root   html;
                index  index.html index.htm;
            }

            location /api {
               proxy_pass   http://localhost:8086/edusys/admin;
            }

        }
3.实现登陆以及切换用户
两种方案
方案一 主进程使用菜单切换


function changeUser() {
  const nm = new Menu();//创建空菜单
  Menu.setApplicationMenu(nm);//菜单设置为空
  createWindows();//创建登陆窗口
  wins.close();//关闭原先的大窗口这里的win是createWindowMain()创建窗口时返回的win
}
function createWindowMain() {
  const win = new BrowserWindow({
    width: 1500,
    height: 1000,
    webPreferences: {
      nodeIntegration: true
    }
  });
  win.loadFile(__dirname + "/dist/index.html");
  // win.webContents.openDevTools();
  reloadTheWin(win);
  return win;
}
function createWindows() {
  const win = new BrowserWindow({
    width: 400,
    height: 600,
    webPreferences: {
      nodeIntegration: true
    }
  });

  win.loadFile(__dirname + "./login.html");
  // reloadTheWins(win);
}
方案二 Vue开发的页面触发切换

这是切换按钮所在的菜单的代码(头部导航的部分代码) 页面点击切换用户触发自定义事件
<el-dropdown>
	<span style="color: black">
		教务处<i class="el-icon-arrow-down el-icon--right"></i>
	</span>
	<el-dropdown-menu slot="dropdown">
	<el-dropdown-item>退出</el-dropdown-item>
	<el-dropdown-item @click.native="changeUser">切换用户</el-dropdown-item>
	</el-dropdown-menu>
</el-dropdown>
<script>
export default {
  name: "MyHeader",
  methods:{
    changeUser(){
      console.log("改变用户")
      let cuss = new CustomEvent("changeUsers");//自定义事件
      window.dispatchEvent(cuss);//触发自定义事件
    }
  }
};
</script>
渲染进程处理代码
window.addEventListener("changeUsers", () => {//监听changeUsers事件
  ipcRenderer.send("changeUsr");//向主进程发送通知
})
主进程处理代码
ipcMain.on('changeUsr',()=>{
  changeUser();
});
function changeUser() {
  const nm = new Menu();//创建空菜单
  Menu.setApplicationMenu(nm);//菜单设置为空
  createWindows();//创建登陆窗口
  wins.close();//关闭原先的大窗口这里的win是createWindowMain()创建窗口时返回的win
}
function createWindowMain() {
  const win = new BrowserWindow({
    width: 1500,
    height: 1000,
    webPreferences: {
      nodeIntegration: true
    }
  });
  win.loadFile(__dirname + "/dist/index.html");
  // win.webContents.openDevTools();
  reloadTheWin(win);
  return win;
}
function createWindows() {
  const win = new BrowserWindow({
    width: 400,
    height: 600,
    webPreferences: {
      nodeIntegration: true
    }
  });

  win.loadFile(__dirname + "./login.html");
  // reloadTheWins(win);
}