When you have a lot of devices that need to be connected to the Internet, the WiFi network is a better choice than wired network; it can avoid the costly process of introducing cables into your home/office and the intricate network connections. The methods and steps of how to connect to WiFi on Windows 10 will be introduced in this MiniTool post.
How to Connect to WiFi on Windows 10
Many people prefer to use WiFi rather than connect to the wired network for many reasons:
- This can avoid the jumbled network cables.
- You can access the Internet from any location within network coverage.
- The WiFi helps to increase the interactivity between devices (for example, transfer files wirelessly).
The question is how to connect to WiFi on Windows 10? Different methods and the detailed steps to enable and use Windows 10 WiFi will be shown to you in the following sections.
MiniTool Power Data Recovery TrialClick to Download100%Clean & Safe
Windows 10 Connect to WiFi Using Taskbar
Connecting to networks or connecting to WiFi Windows 10 is not a difficult task for even ordinary users. But considering that you don’t know how to turn WiFi on Windows 10, I’ll tell you what you should do exactly.
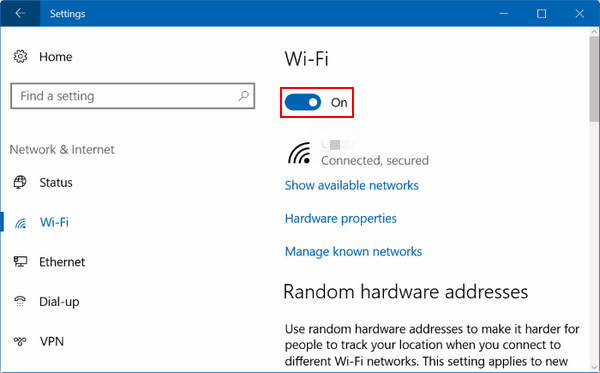
How to enable WiFi Windows 10:
- Open Settings by pressing Windows + I.
- Select Network & Internet from the Settings window.
- Shift to the Wi-Fi option in the left pane.
- Toggle the switch under Wi-Fi to On in the right pane.
You can also turn on WiFi Windows 10 by pressing Fn + Wi-Fi button or clicking on the Wi-Fi icon on the taskbar. ( How do you fix when the Windows 10 taskbar is not working?)
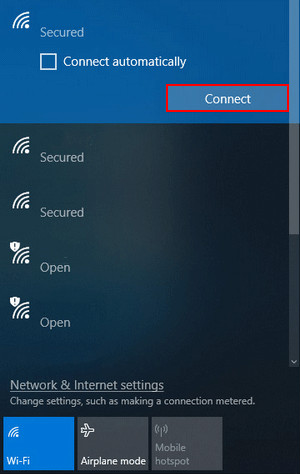
How to connect to WiFi:
- Navigate to the bottom right corner of your PC screen.
- Click on the Network icon.
- Browse the wireless networks available for you.
- Click on the one you want to connect.
- Click Connect -> type the password required -> click Next.
To disconnect the WiFi, you should select it by above steps and then click Disconnect.
If you don’t see the Network icon in step 2, you must troubleshoot it.
- Click on the Up arrow to see if it is included here -> click it.
- Press Windows + A to open the Action Center -> look for the Network button in the Quick actions section -> click it.
That’s all about connecting to WiFi on your Windows 10 computer.
Windows 10 Add a New Network via Settings
- Open Settings by pressing Windows + I or other ways.
- Choose Network & Security and select Wi-Fi.
- Click on the Manage known networks link in the right pane.
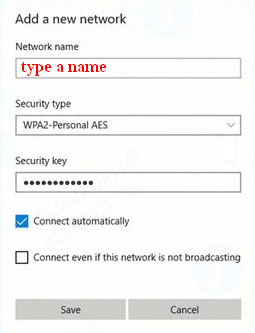
- Select Add a new network.
- Type a Network name -> select a proper Security type -> enter a Security key -> check Connect automatically and Connect even if this network is not broadcasting according to needs -> click on the Save button.
Windows 10 Set up a New Connection or Network
- Open Settings -> select Network & Security -> choose Dial-up.
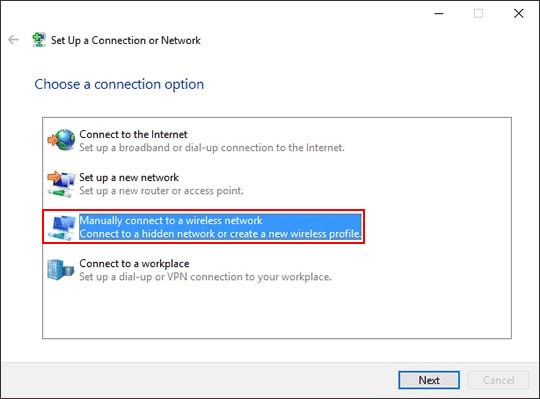
- Click on the Set up a new connection link.
- Select Manually connect to a wireless network and click Next.
- Type a Network name -> select a Security type -> enter a Security key -> check Start this connection automatically and Connect even if the network is not broadcasting (optional) -> click Next -> click Close.
Windows 10 Connect to WiFi through Command Prompt
- Run the Command Prompt as administrator.
- Type netsh wlan show profile and hit Enter.
- Confirm the information.
- Type netsh wlan connect ssid=a=b (a is network name while b is profile name) and hit Enter.
- Wait for the operations to finish.
How to recover files using Command Prompt (CMD)?