How to use Nvidia Image Scaling
Get a free performance boost on almost any Nvidia graphics card


Nvidia Image Scaling might not be computer magic on par with DLSS, but it can perform a similarly useful job: boosting your frame rates by rendering games at a lower resolution, then upscaling them to match your monitor’s native res. Unlike DLSS, it also doesn’t require one of the best graphics cards from Nvidia’s RTX range, only an Nvidia GPU from the Maxwell generation or later – so the performance benefit is available to far more potential users. However, the issue of exactly how to use Nvidia Image Scaling isn’t very well-explained by Nvidia’s own software, so I suppose the task falls to this guide you’re already reading.
The way Image Scaling works is actually much more akin to AMD’s FidelityFX Super Resolution (FSR) than the AI-fuelled DLSS, because it doesn’t add any clever anti-aliasing of its own, simply applying an upscaling algorithm with a sharpening effect to reduce visible blurriness. Unlike both DLSS and FSR, however, it’s also distinct in that you’ll need to set it up outside of your games, as opposed to just flicking a switch within them. The upside of this approach is that Image Scaling can potentially work with any game, not just those with developer-crafted support for it.
 What’s the Latest? DLSS 2.3 & How It Keeps Learning
There are in fact two methods of enabling Image Scaling, both of which are detailed below. I’d definitely start with the Nvidia Control Panel method, which is slightly more involved than using Nvidia GeForce Experience, but also gives you more control. Using GeForce Experience is easier, especially if you already rely on it to set your games’ other graphical settings, though it can also introduce compatibility issues: a game that can’t be “Optimised” through GeForce Experience won’t have Image Scaling applied unless you set it through Nvidia Control Panel instead.
Whichever one you use, first make sure your Nvidia graphics card drivers are up to date, as is GeForce Experience if you’re going that route.
How to use Nvidia Image Scaling with Nvidia Control Panel
Step 1: Open up Nvidia Control Panel and click “Manage 3D settings”. Under Global Settings, you should see the Image Scaling setting at the top of the list; if it’s not there, update your graphics card drivers to the latest version.
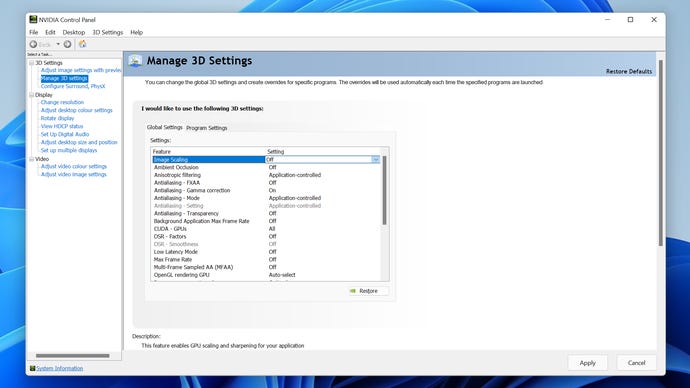
Step 2: Click on Image Scaling and set it to “On (GPU Scaling & Sharpening)” while leaving the Overlay Indicator box checked for now. You can also adjust the slider to choose the global sharpening filter intensity, though you may eventually wish to set different sharpening values for different games (see below). To start with, I’d recommend leaving the slider in the 60-70% range, as this will generally make upscaled games look more crisp without appearing overly processed.
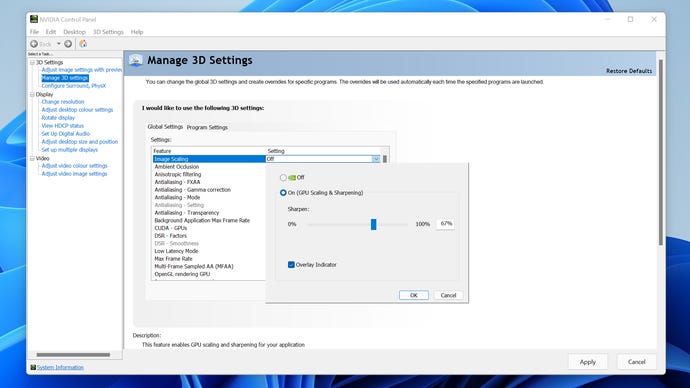
Step 3: Click “OK”, then “Apply” to save your changes. Exit Nvidia Control and launch a game.
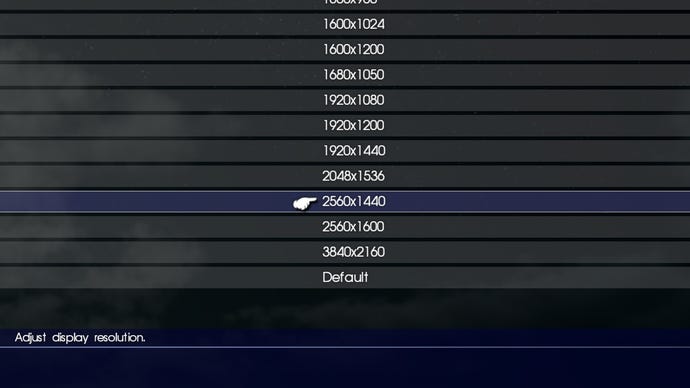
Step 4: Step 3: Assuming you left the Overlay Indicator box checked, you should see a blue “NIS” indicator in the corner of your screen. This means the sharpening component of Image Scaling is in effect, but not the upscaling. The enable the latter and get your performance boost, navigate to the game’s display settings and set the display resolution to something that’s lower than your native resolution, but also uses the same aspect ratio. For example, if you’re using a 3840x2160 monitor, set it to 2450x1440 or 1920x1080. The lower you go, the bigger performance gain you’ll get, though the image quality will be lower even with upscaling.
Step 5: Once you’ve applied the resolution change, the NIS indicator should change from blue to green; this shows that both the upscaling and sharpening components are in effect. If it doesn’t change colour, quitting and restarting should fix it.
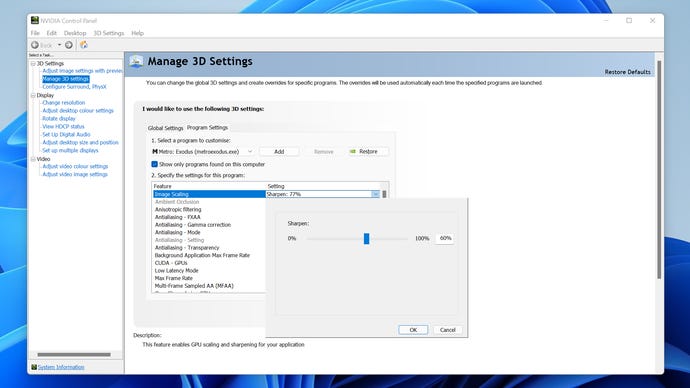
Step 6: As you try Image Scaling with different games, you might notice the global sharpening value might be too high or too low for specific games. In which case, you can go back into Nvidia Control Panel, click “Manage 3D settings” and open the Program Settings tab. From there, select a game from the drop-down list of applications, click on Image Scaling and set a different sharpening value using the slider. Click “OK then “Apply” to finish, and note that you can only do this if Image Scaling is already enabled in the Global Settings tab; while you can customise sharpening on a per-game basis, Nvidia Control Panel won't let you have Image Scaling enabled for certain games and disabled for others at the same time.
How to use Nvidia Image Scaling with GeForce Experience
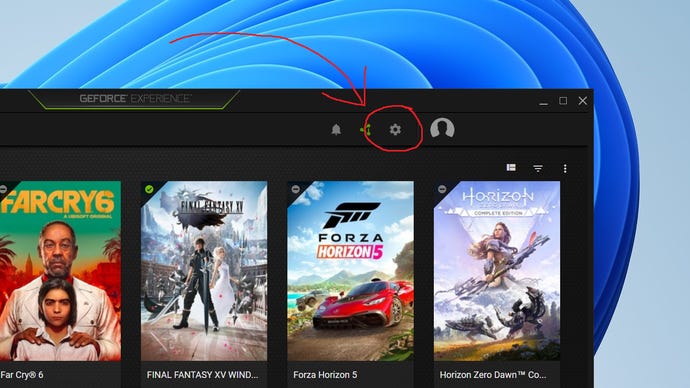
Step 1: Open GeForce Experience and open the General Settings menu by clicking the cog icon.
Step 2: Scroll down to the Image Scaling section and click the toggle to turn it on.
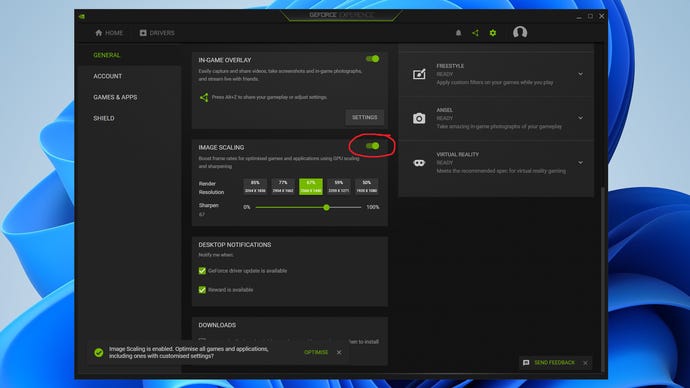
Step 3: This method differs from the Control Panel method in that you select a render resolution outside the game. Click on a resolution option from the ones presented to you, then either a) click on the green “Optimise” text that appears in the popup, applying the settings to all your games at once or b) navigate to a specific game on the Home tab, then click “Optimise”.

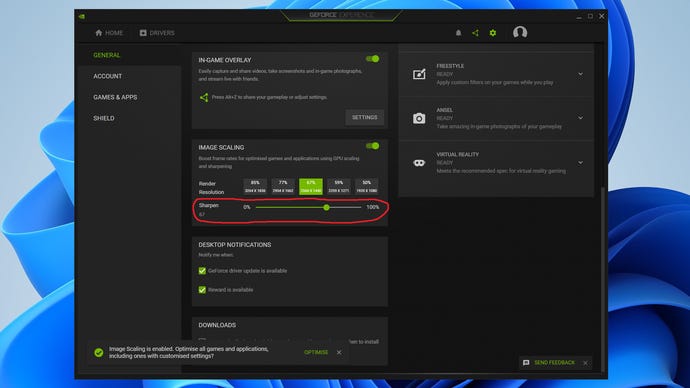
Step 4: Don’t forget to set the sharpening filter! This can be done with the slider just below the render resolution options. Somewhere in the 60-70% range seems to work well for most games, though you can always adjust it later.
Step 5: Launch the optimised game and check that Image Scaling is working. There should be a green “NIS” indicator in the corner of your screen, and the display resolution should be set to whichever render resolution setting you chose. If it hasn’t worked, exit the game and select a different resolution using the same steps. If the NIS text is blue, it means sharpening is being applied, but not upscaling.